Magento
Simplifying Tap Payments Integration for Your Magento Store
Introduction
This guide provides step-by-step instructions for installing and configuring Tap Payments’ plugin for Magento, enabling a seamless and secure payment experience for your customers.
This guide assumes that Magento is already installed on your system, with one of the following versions:
- Adobe Commerce (cloud): 2.4.x
- Adobe Commerce (on-prem): 2.4.x
- Magento Open Source: 2.4.x
You can install our Magento plugin from here.
Supported Features
- Merchant Onboarding directly from the Magento platform
- 3D Secure 2.0
- Different checkout modes:
- Popup
- Redirection
- Card Saving
- Apple Pay
- Alternative payment methods
- Web Card SDK
- KNET
- Benefit
- Tabby
- Fawry
Installation Guide
Using Composer
- Access the root directory of your Magento server, usually located at
/var/www/html. - Use one of these commands:
composer require tappayments/module-payment-gateway
composer require tappayments/module-payment-gateway:1.0.3- If prompted for authentication, use the access keys from your Magento account at the following link:
Adobe Commerce Marketplace Access Keys - Once the installation is complete, recompile your Magento 2 installation and clear the cache before configuring the plugin. Execute the following commands in order:
php bin/magento setup:upgrade
php bin/magento setup:di:compile
php bin/magento setup:static-content:deploy -f
php bin/magento indexer:reindex
php bin/magento cache:clean
You are now ready to configure the plugin.
Configuration Guide
Log in to the admin panel and navigate to Stores -> Configuration to set up your plugin.
Store Configuration
Under General -> Store Information, configure the following details:
- Store Name: Enter your store's name.
- Store Number: Provide the store's contact phone number.
- Country: Select the country where your store is based.
Next, go to General -> Store Email Addresses to set your store's contact email address.
Plugin Configuration
Once the store details are configured, proceed with the onboarding:
- Navigate to Sales -> Payment Methods.
- Switch to Tap Payment Method.
- Click the 'Connect' button.
The system will automatically gather your configured store information and email address, redirecting you to Tap Payments to complete the setup.
After completing the Tap Payments registration, you'll be redirected back to the Tap Payments configuration page in Magento. The extension will automatically configure all required keys and merchant information for transactions.
Basic Configuration
Configure the fundamental settings for Tap payments to ensure proper integration and functionality. These options are crucial for setting up Tap payments.
| Name | Description |
|---|---|
| Status | Activate Tap as a payment method. |
| Sandbox Mode | Toggle this setting to use the sandbox environment for testing and debugging. |
| Debug | Enable debug mode to log information for troubleshooting. |
| Transaction Mode | Select the mode for processing transactions (e.g., Charge/Capture). |
| Merchant ID | Your unique identifier for your account provided by Tap. Will be auto filled after the onboarding. |
| Test Public Key | The public key for the sandbox mode. Will be auto filled after the onboarding. |
| Test Secret Key | The secret key for the sandbox mode. Will be auto filled after the onboarding. |
| Live Public Key | The public key for live transaction processing. Will be auto filled after the onboarding. |
| Live Secret Key | The secret key for live transaction processing. Will be auto filled after the onboarding. |
Ensure all keys and modes are correctly set according to your environment (sandbox or live) to facilitate smooth payment processing.
Card Payment Configuration
Optimize your checkout process with Tap Payments by choosing between two dynamic payment modes: Popup or Redirect. Here’s a guide on the setup:
-
Enable: Turn this payment method on.
-
Checkout Mode: Choose between Popup or Redirect.
-
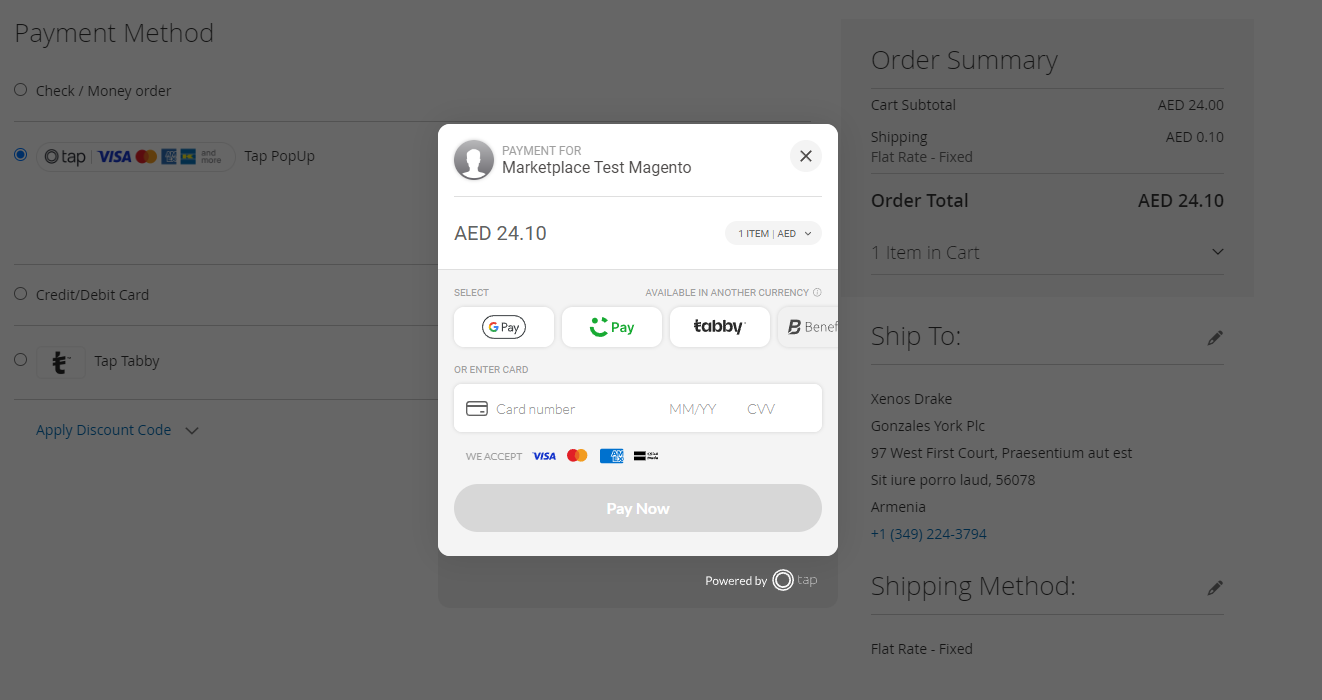
Popup Mode: The customer remains on your website, and a popup appears after they click the "Place Order" button to enter their credit/debit card details. A live demo can be found here .Below is a screenshot example of the popup mode:

-
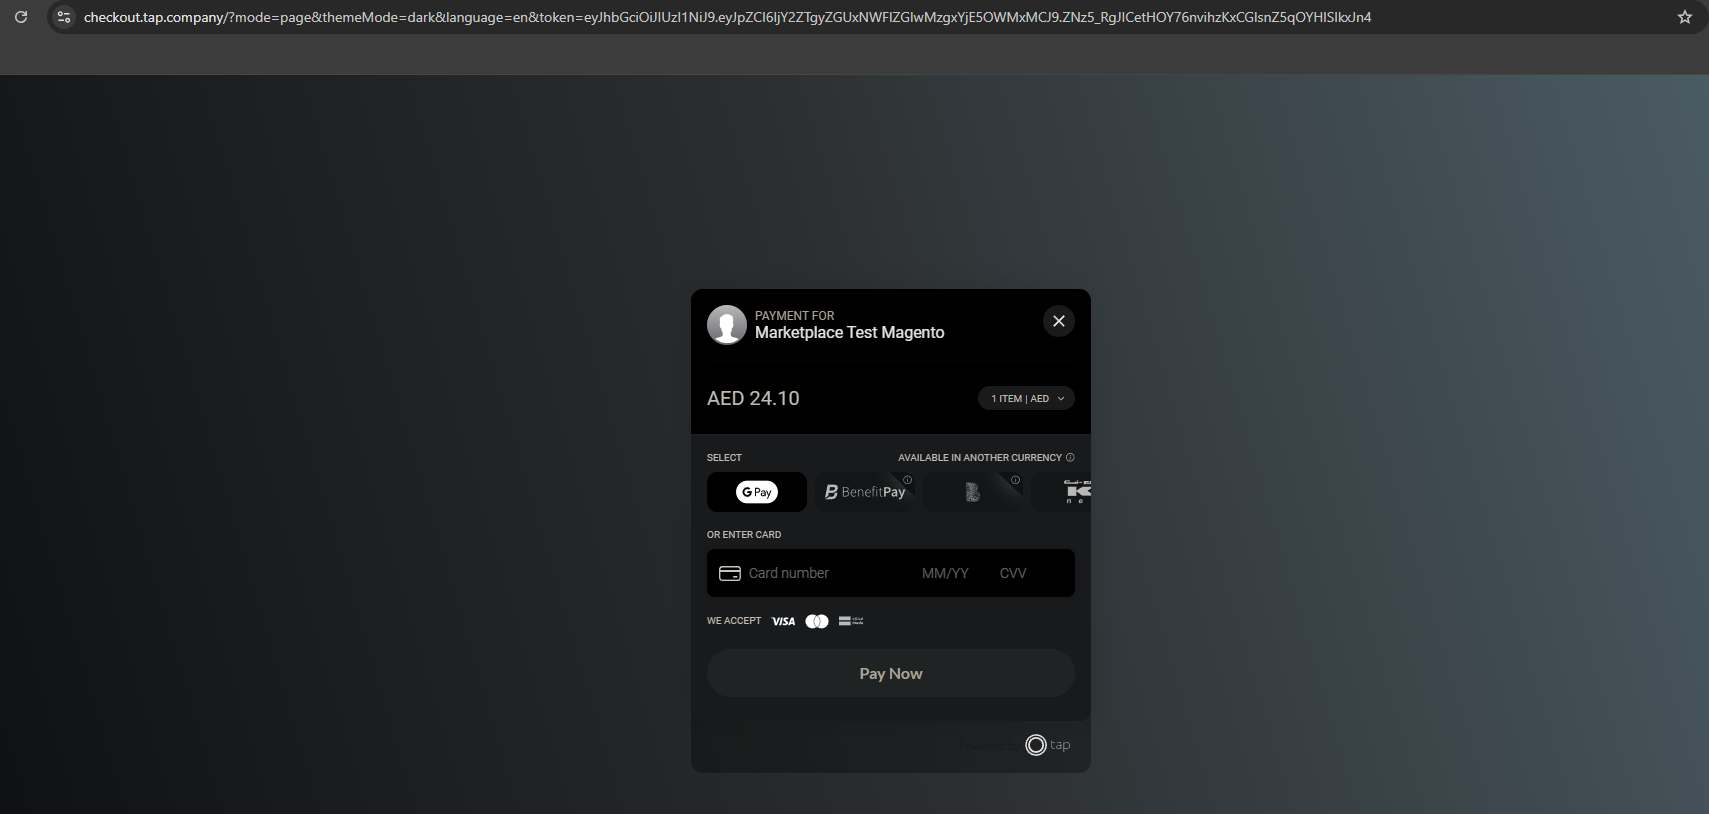
Redirect Mode: Customers are redirected to the Tap Payments checkout page to complete the transaction. Below is a screenshot of the redirect mode:

-
-
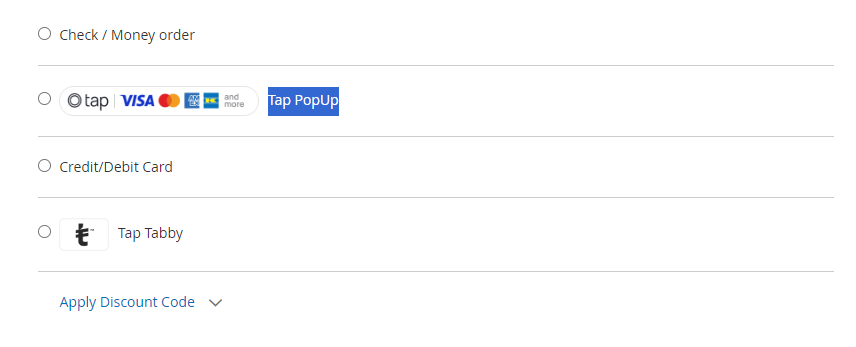
Popup/Redirect Title: Set the title that appears at checkout. Below is an example of a title set to Tap PopUp:

-
Popup/Redirect Theme: Choose the theme for the popup or payment form. Available themes include:
- Dark
- Light
- Dynamic
-
Save Card Option: Enable the option to allow customers to save their cards for future use.
-
3D Secure: Enable 3D Secure.
-
Cardholder Name: Enable this field if you wish to ask customers for their name during checkout.
Tap Payments supports the following card schemes:
- Visa
- Mastercard
- Mada
- American Express
- OmanNet
- Benefit
For more details about card payments, refer to the Card Payments guide.
Test your integration
- Go to your store and add a product to your cart.
- Proceed to the checkout page.
- Select the Tap payment method.
- Enter the following card details:
- Card Number:
5123450000000008 - Expiry Date:
01/39 - CVV:
123 - For a full list of test cards available, please refer to this guide
- Card Number:
- Place your order. You will be redirected to the receipt (order confirmation) page.
Go Live
If you're satisfied with your results and ready to start accepting payments, disable sandbox mode to start accepting real payments.
Alternative Payment Methods
Configure various payment methods to ensure a seamless checkout experience for your customers, tailored to your store's currency requirements.
Web Card SDK Configuration
- Status: Enable this option to allow customers to use the web card SDK.
- Card SDK Title: Enter the title that will be displayed for the card SDK on the checkout page.
- Theme: Select a theme for the embedded Card SDK form. Available themes include:
- Light.
- Dark.
- Payment Brand: Decide if you want to show the payment brand logo at checkout.
- Card Style: Configure the style of the payment card input field. Available styles include:
- Curved.
- Straight.
- Language: Configure the language for the native checkout. Available languages include:
- Arabic.
- English.
- Dynamic.
- Cardholder Name: Choose whether to request the cardholder's name during checkout.
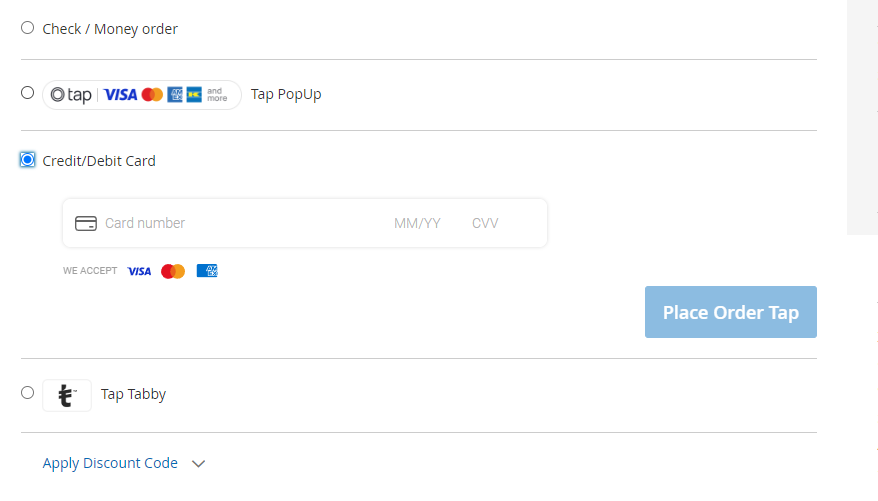
You can find a demo on the web card SDK here and below is a screenshot of the web card SDK on the Magento checkout page:

Apple Pay Configuration
- Status: Enable this option to allow customers to use Apple Pay as a payment method.
- Apple Pay Title: Enter the title that will be displayed for Apple Pay on the checkout page.
- Theme: Choose the theme for the Apple Pay button.
For Apple Pay to function properly, there are a few essential prerequisites that need to be met. These requirements ensure a smooth integration and operation of Apple Pay on your website. You can review the full list of prerequisites, including supported devices, certificates, and platform-specific guidelines, by referring to the official documentation here.
KNET Configuration
- Status: Enable KNET payment.
- KNET Title: Set the title for KNET on the checkout page.
Ensure that your store’s currency is set to KWD for the KNET payment option to be available at checkout. For more details about this payment method, refer to the KNET guide
Benefit Configuration
- Status: Enable this option to allow customers to use Benefit as a payment method.
- Benefit Title: Set the title for Benefit on the checkout page.
Make sure your store’s currency is set to BHD for the Benefit payment option to be available at checkout. For more details about this payment method, refer to the Benefit guide
Tabby Configuration
- Status: Enable this option to allow customers to use Tabby as a payment method.
- Tabby Title: Enter the title that will be displayed for Tabby on the checkout page.
Ensure that your store’s currency is set to AED, SAR, or KWD for the Tabby payment option to be available at checkout. For more details about this payment method, refer to the Tabby guide
Fawry Configuration
- Status: Enable this option allow customers to use Fawry as a payment method.
- Fawry Title: Enter the title that will be displayed for Fawry on the checkout page.
Ensure that your store’s currency is set to EGP for the Fawry payment option to be available at checkout. For more details about this payment method, refer to the Fawry guide
Updated 9 months ago
