
Web Card SDK V2
Integrating Card SDK (V2) in Your Website
Introducing the TAP Card JavaScript library v2, an enhanced and streamlined solution tailored for crafting seamless payment experiences. This powerful tool simplifies the integration process, empowering you to effortlessly create secure payment flows within your web applications while ensuring the utmost protection of sensitive card information.
In this guide, we will walk you through the step-by-step process of integrating the latest TAP Card JavaScript library v2, showcasing its enhanced features such as simplified integration and efficient card tokenization.
Setup your Tap Account
If you haven't done so already, please register your business in Tap Payments in order to setup your own account and get the required public keys to start the Web Card SDK v2 integration.
Integrate Web Card SDK v2
In this section we will guide you on how to implement Web Card SDK v2 using Vanilla JS.
Here is a demo page for trying out our new Card SDK in beta.
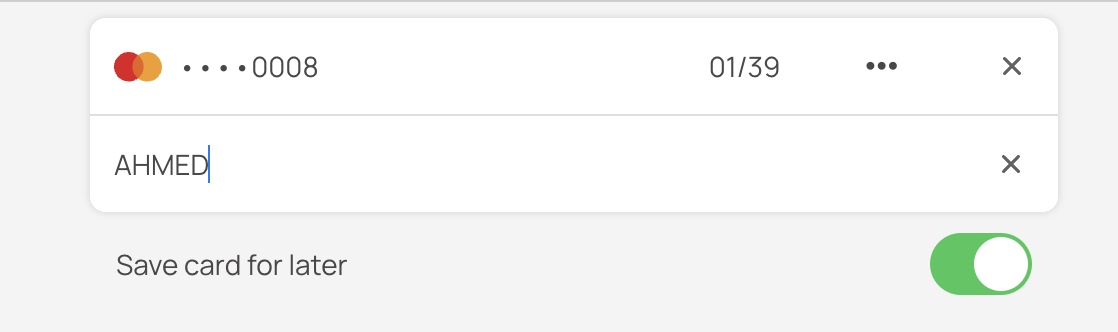
The SDK will display the available payment methods and gather payment details from your customers.
Embed the SDK Script
In your HTML file, you have to embed the Card SDK v2 as per the below:
<script src="https://tap-sdks.b-cdn.net/card/1.0.2/index.js"></script>Create a DOM element for Card SDK v2
Create a DOM container element within your checkout page to specify where the Card SDK will be displayed, assigning it an identifier.
<div id="card-sdk-id"></div>
We highly advise not to embed the Card SDK within an iframe element to avoid potential complications.
Configure the Card SDK
For this implementation to work, initialize essential functions and constants provided within the SDK. These functions and constants facilitate the seamless integration of the Web Card SDK into your web page.
Once the initialization is complete, you can proceed to configure the Web Card SDK to tailor the checkout flow according to your specific requirements and preferences. This involves creating a comprehensive configuration setup covering various aspects of the checkout process to enhance the user experience for your customers.
In this section we will list the parameters that can be used as well as completing the configuration of the SDK.
Parameters
Here you can see all the parameters that can be passed to the Card SDK configuration.
| Name | Type | R/O | Description |
|---|---|---|---|
| publicKey | string | required | The public Key provided by Tap |
| merchant | object | optional | The merchant object |
| merchant.id | string | optional | The merchant's Tap id. |
| transaction | object | required | The transaction object |
| transaction.amount | number | required | The transaction amount. |
| transaction.currency | string | required | The transaction currency. |
| customer | object | optional | The customer object |
| customer.id | string | optional | The Tap customer ID |
| customer.name | Array | optional | The customer name object |
| customer.name[index].lang | string | optional | The customer name language |
| customer.name[index].first | string | optional | The customer first name |
| customer.name[index].last | string | optional | The customer last name |
| customer.name[index].middle | string | optional | The customer middle name |
| customer.name.nameOnCard | string | optional | The customer name on card |
| customer.name.editable | boolean | optional | To control the name editing |
| customer.contact | object | optional | The customer contact object |
| customer.contact.email | string | optional | The customer email |
| customer.contact.phone | object | optional | The customer phone object |
| customer.contact.phone.countryCode | string | optional | The customer phone country code |
| customer.contact.phone.number | string | optional | The customer phone number |
| acceptance | object | optional | The acceptance object |
| acceptance.supportedBrands | string[] | optional | The supported brands |
| acceptance.supportedCards | string[] | optional | The supported cards. Ex:
|
| fields | object | optional | The fields object |
| fields.cardHolder | boolean | optional | To show/hide the card holder name |
| addons | object | optional | The addons object |
| addons.loader | boolean | optional | To show/hide the loader on the card |
| addons.saveCard | boolean | optional | To show/hide the save card option |
| addons.displayPaymentBrands | boolean | optional | To show/hide the payment brands section |
| interface | object | optional | The interface object |
| interface.locale | string | optional | The card locale |
| interface.theme | string | optional | The card theme |
| interface.edges | string | optional | The card edges |
| interface.direction | string | optional | The card direction |
| onReady | function | optional | Callback function runs when card becomes ready |
| onFocus | function | optional | Callback function runs when card is focused |
| onBinIdentification | function | optional | Callback function runs when bin is identified |
| onValidInput | function | optional | Callback function runs when card inputs are valid |
| onInvalidInput | function | optional | Callback function runs when card inputs are invalid |
| onError | function | optional | Callback function runs when card has an error |
| onSuccess | function | optional | Callback function runs when card is successfully done |
Card SDK Configuration
In this section we showcase the JavaScript code needed to configure the Web Card SDK v2.
Note that it is mandatory to pass the public key linked to your Tap account, which you can find by logging in to Tap's business dashboard, as well as specifying your Tap merchant ID.
const { renderTapCard, Theme, Currencies, Direction, Edges, Locale } = window.CardSDK
const { unmount } = renderTapCard('card-sdk-id', {
  publicKey: 'pk_test_...', // Tap's public key
  merchant: {
    id: 'merchant id'
  },
  transaction: {
    amount: 1,
    currency: Currencies.SAR
  },
  customer: {
    id: 'customer id', //Tap's customer ID with syntax cus_xxx
    name: [
      {
        lang: Locale.EN,
        first: 'Test',
        last: 'Test',
        middle: 'Test'
      }
    ],
    nameOnCard: 'Test',
    editable: true,
    contact: {
      email: '[email protected]',
      phone: {
        countryCode: '971',
        number: '52999944'
      }
    }
  },
  acceptance: {
    supportedBrands: ['AMERICAN_EXPRESS', 'VISA', 'MASTERCARD', 'MADA'], //Remove the ones that are NOT enabled on your Tap account
    supportedCards: "ALL" //To accept both Debit and Credit
  },
  fields: {
    cardHolder: true
  },
  addons: {
    displayPaymentBrands: true,
    loader: true,
    saveCard: true
  },
  interface: {
    locale: Locale.EN,
    theme: Theme.LIGHT,
    edges: Edges.CURVED,
    direction: Direction.LTR
  }
})
Add the Event Handlers
To keep the payers aware of what is happening during the payment process, make sure to add the callback functions in the SDK configuration. This will allow you to know the the SDK is ready to be used, if the inputs entered are valid or not, if there is any errors and in the success flow, it will display the tokenized card that the customer has submitted.
  onReady: () => console.log('onReady'),
  onFocus: () => console.log('onFocus'),
  onBinIdentification: (data) => console.log('onBinIdentification', data),
  onValidInput: (data) => console.log('onValidInputChange', data),
  onInvalidInput: (data) => console.log('onInvalidInput', data),
  onError: (data) => console.log('onError', data),
  onSuccess: (data) => console.log('onSuccess', data),
  onChangeSaveCardLater: (isSaveCardSelected) => console.log(isSaveCardSelected, " :onChangeSaveCardLater") // isSaveCardSelected:boolean
Full HTML Code Sample
In this section you will find the full code sample of the HTML and JavaScript codes that you can use to easily test the integration. Make sure to use the correct public key linked to your Tap account.
<!DOCTYPE html>
<html lang="en">
	<head>
		<meta charset="UTF-8" />
		<meta http-equiv="X-UA-Compatible" content="IE=edge" />
		<meta name="viewport" content="width=device-width, initial-scale=1.0" />
		<script src="https://tap-sdks.b-cdn.net/card/1.0.2/index.js"></script>

		<title>card demo</title>
	</head>
	<body>
		<div id="card-sdk-id"></div>
		<script>
			const { renderTapCard, Theme, Currencies, Direction, Edges, Locale } = window.CardSDK
			const { unmount } = renderTapCard('card-sdk-id', {
				publicKey: 'pk_test_...',
				merchant: {
					id: 'merchant id'
				},
				transaction: {
					amount: 1,
					currency: Currencies.SAR
				},
				customer: {
					id: 'customer id',
					name: [
						{
							lang: Locale.EN,
							first: 'Test',
							last: 'Test',
							middle: 'Test'
						}
					],
					nameOnCard: 'Test Test',
					editable: true,
					contact: {
						email: '[email protected]',
						phone: {
							countryCode: '20',
							number: '1000000000'
						}
					}
				},
				acceptance: {
					supportedBrands: ['AMERICAN_EXPRESS', 'VISA', 'MASTERCARD', 'MADA'],
					supportedCards: "ALL"
				},
				fields: {
					cardHolder: true
				},
				addons: {
					displayPaymentBrands: true,
					loader: true,
					saveCard: true
				},
				interface: {
					locale: Locale.EN,
					theme: Theme.LIGHT,
					edges: Edges.CURVED,
					direction: Direction.LTR
				},
				onReady: () => console.log('onReady'),
				onFocus: () => console.log('onFocus'),
				onBinIdentification: (data) => console.log('onBinIdentification', data),
				onValidInput: (data) => console.log('onValidInputChange', data),
				onInvalidInput: (data) => console.log('onInvalidInput', data),
           onChangeSaveCardLater: (isSaveCardSelected) => console.log(isSaveCardSelected, " :onChangeSaveCardLater"), // isSaveCardSelected:boolean
				onError: (data) => console.log('onError', data),
				onSuccess: (data) => console.log('onSuccess', data)
			})
		</script>
	</body>
</html>
Get the Tap Token
After the Web Card SDK is fully configured and initialized, you need to create a submit button in order to submit the payment form. In order to tokenize the card added, you have to also import the tokenize method that is available within the SDK to complete this step.
The Sequence Diagram of the Payments With the Card SDK
sequenceDiagram
  participant Customer
  participant Frontend
  participant Backend
  participant TapPayments
  participant CardSDK

  Note over Customer, CardSDK: Initial Setup
  Customer->>Frontend: Enters website page
  Customer->>Frontend: Enters card details<br/>(card number, expiry, CVV, name)
  Customer->>Frontend: Clicks pay button

  Note over Frontend, CardSDK: Tokenization Process
  Frontend->>CardSDK: window.CardSDK.tokenize()
  CardSDK-->>Frontend: Returns token ID (tok_xxxx)<br/>via onSuccess callback

  Note over Frontend, Backend: Backend Processing
  Frontend->>Backend: Sends token ID
  Backend->>TapPayments: Makes payment request
  TapPayments-->>Backend: Returns transaction ID<br/>and 3DS URL
  Backend-->>Frontend: Sends 3DS URL

  Note over Customer, TapPayments: 3D Secure Authentication
  Frontend->>Customer: Redirects to 3DS URL
  Customer->>TapPayments: Enters 3DS OTP
  Customer->>TapPayments: Clicks submit button
  TapPayments->>Frontend: Redirects to redirect URL<br/>with tap_id parameter

  Note over Frontend, TapPayments: Transaction Verification
  Frontend->>Backend: Sends transaction ID<br/>(extracted from tap_id)
  Backend->>TapPayments: Requests transaction details
  TapPayments-->>Backend: Returns transaction details

  Note over Backend, TapPayments: Webhook Verification
  TapPayments->>Backend: Sends webhook with transaction details<br/>(includes hashstring header)
  Backend->>Backend: Generates hashstring<br/>and validates against webhook header

  alt Hashstring is valid
      Backend-->>Frontend: Returns success response
  else Hashstring is invalid
      Backend-->>Frontend: Returns error response
  end

  Frontend->>Customer: Displays success/failure message
In this section we will share the methods can be used within the SDK as well as calling the tokenize method to convert the raw card details to tokens.
Card Methods
To leverage the full functionality of the SDK, it's essential to comprehend the array of methods at your disposal. Here, we'll outline each method alongside its purpose, followed by guidance on incorporating them into your codebase.
Methods List
| Name | Description |
|---|---|
| resetCardInputs | Reset the card inputs |
| saveCard | Save the card data |
| tokenize | Tokenize the card date |
| updateCardConfiguration | Update the card configuration. For example updating the currency to show the supported payment methods ex: transaction: {currency: "USD" } will shows only the payment methods that supports USD currency |
| updateTheme | Update the card theme by sending in the parameter "dark" or "light" |
| loadSavedCard | Load the saved card by card id |
Import Methods in your Code
You can import all the required methods from the SDK as follows:
const {
  tokenize,
  resetCardInputs,
  saveCard,
  updateCardConfiguration,
  updateTheme,
  loadSavedCard } = window.CardSDK
Tokenize the Card
To submit the card details that were added in the Web Card v2, you need to create a button, and on this button you need to add the onclick event and call the tokenize method from the SDK to the Tap token.
You can either call the tokenize method in the JavaScript code or directly in the onclick event of the button, in the HTML file, as per the below.
<button id="card-v2" onclick="window.CardSDK.tokenize()">Submit</button>Tokenize Result
In the onSucess callback you will receive the Tap token that you need pass to the source.id of the create a charge API to complete the payment with the added card.
Here is a sample of the token response that you will receive
{
    "id": "tok_xuCp45241437ANEj31F4P426",
    "status": "ACTIVE",
    "created": 1714747065426,
    "object": "token",
    "live_mode": false,
    "type": "CARD",
    "purpose": "CHARGE",
    "used": false,
    "card": {
        "id": "card_cfeU45241437Saus3j947433",
        "object": "card",
        "on_file": false,
        "address": {},
        "funding": "CREDIT",
        "fingerprint": "B1XZy88SUJkZ4%2FP%2Bn16CZO7k2l34nUHNoephQ0T94hA%3D",
        "brand": "VISA",
        "scheme": "VISA",
        "category": "",
        "exp_month": 1,
        "exp_year": 39,
        "last_four": "1111",
        "first_six": "411111",
        "first_eight": "41111111",
        "name": "Test"
    },
    "payment": {
        "id": "card_cfeU45241437Saus3j947433",
        "on_file": false,
        "card_data": {
            "exp_month": 1,
            "exp_year": 39,
            "last_four": "1111",
            "first_six": "411111",
            "first_eight": "41111111",
            "address": {}
        },
        "fingerprint": "B1XZy88SUJkZ4%2FP%2Bn16CZO7k2l34nUHNoephQ0T94hA%3D",
        "scheme": "VISA",
        "category": ""
    },
    "merchant": {
        "id": "12345"
    }
}
Before You Go Live
To work on live mode you have to use the API key related to the hosting domain.To register the hosting domain you have to contact [email protected] to register your domain. After the integration team confirms the domain is registred then you can find the needed Keys added in your account.
Note that the API key for the registred domain can work with all the subdomains related to the registred domain.
Updated 9 months ago